Philipp Pruesse, Sales Manager, Dimensionics Density
In the world of modern manufacturing, additive manufacturing (AM) has emerged as a revolutionary technology that holds the promise of transforming industries through its capability to produce complex geometries, reduce lead times, and enable on-demand production.
However, as the adoption of AM grows across sectors ranging from aerospace to medical devices, one critical challenge remains: ensuring the quality and reliability of 3D printed components. Quality validation in AM is a multidimensional endeavour that encompasses a range of testing, verification, and analysis techniques aimed at guaranteeing the structural integrity and functional performance of printed parts. At the heart of this validation process lies the crucial aspect of density determination, which plays a pivotal role in unlocking the full potential of additive manufacturing.
Ablauf2.57
The Promise and Challenges of Additive Manufacturing
AM has captured the imagination of designers, engineers, and manufacturers alike due to its ability to fabricate intricate structures and custom designs that were previously unattainable through conventional manufacturing methods. As everyone today knows, unlike subtractive manufacturing, where material is removed to shape a part, AM builds objects layer by layer, often using powdered materials or metals/polymers that are selectively fused or cured to form the final product. This layer-by-layer approach allows for greater design freedom, reduced waste, and the consolidation of parts, leading to more efficient production processes.
Yet, as the technology continues to evolve, ensuring the quality and reliability of 3D printed components has emerged as a critical concern. The intricate nature of AM processes introduces complexities that demand a comprehensive quality validation strategy. Unlike traditional manufacturing techniques, where the mechanical properties of a material are relatively predictable, the properties of 3D printed parts can be influenced by factors such as layer adhesion, cooling rates, and local material variations. These nuances can lead to internal defects, such as voids and porosities, that may compromise the mechanical integrity of the final component.
Quality Validation: A Multifaceted Approach
Quality validation in AM necessitates a multifaceted approach that combines advanced testing methodologies, thorough verification processes, and rigorous analysis techniques. This approach seeks to uncover potential defects, assess mechanical properties, and validate the parts’ performance against specific industry standards and requirements. The journey from digital design to physical part involves multiple stages, each of which presents unique challenges and opportunities for quality validation.
The first stage involves pre-printing validation, where the digital design is meticulously examined to ensure its suitability for AM. This includes considerations such as geometry optimization, support structure generation, and the integration of internal channels or lattice structures that can enhance a part’s performance. By simulating the printing process digitally and evaluating factors such as heat distribution and stress accumulation, engineers can pre-emptively identify potential issues that could arise during actual manufacturing.
Once the design is deemed suitable, the printing process commences. During printing, monitoring and process control are essential for maintaining the desired quality. In-situ sensors and cameras can provide real-time data on parameters like temperature, humidity, and layer adhesion, allowing for immediate adjustments if irregularities are detected. Post-printing, non-destructive testing (NDT) techniques, including X-ray and CT scanning, can reveal internal defects that might not be visible to the naked eye. NDT is particularly important for safety-critical applications like aerospace and medical devices, where even small defects can have catastrophic consequences.
Density L V2.1370
Density Determination: The Key to Reliability
At the heart of quality validation in AM lies the critical factor of density determination. Density, in the context of AM, refers to the mass of a part per unit volume. It serves as a direct indicator of the material’s structural integrity and porosity. High density implies a solid, homogeneous structure with minimal voids, while low density suggests the presence of internal defects that could compromise the part’s mechanical properties.
Achieving optimal density in 3D printed components is imperative for ensuring their reliability and functional performance. Thorough density analysis allows manufacturers to identify regions of potential weakness, porosity, or irregularities within the printed objects. By understanding the density distribution, engineers can fine-tune printing parameters, such as print speed, temperature, and material composition, to minimize defects and achieve consistent, desirable properties throughout the part.
Density determination holds profound implications for a component’s mechanical behaviour. A part with higher density is likely to exhibit enhanced mechanical strength, as the reduced presence of voids and porosity improves load-bearing capacity and resistance to fractures. The absence of internal imperfections also leads to improved fatigue resistance, which is critical for parts subjected to repetitive loading cycles. Furthermore, optimal density contributes to dimensional accuracy, ensuring that the final part closely adheres to design specifications. This accuracy is vital for functional compatibility and assembly, especially in industries where precise tolerances are essential.
On the other hand, inadequate density or excessive porosity within 3D printed components can lead to compromised mechanical properties. Lower density regions are prone to reduced strength, potentially resulting in premature failures under load. Porous regions can impair thermal and electrical conductivity, limiting a part’s suitability for applications requiring these properties. In safety-critical sectors like aerospace, medical, and automotive, even the slightest compromise in mechanical integrity can have far-reaching consequences.
Advances in Density Analysis Techniques
Density XS V3.135
Recent advances in AM have brought forth sophisticated density analysis techniques that empower engineers and researchers to gain deeper insights into the internal structure of 3D printed components. X-ray computed tomography (CT) scanning, for instance, enables the visualization of internal features and defects in a non-destructive manner. This technique reconstructs cross-sectional images of a part and allows for the identification of voids, porosity, and even the characterization of complex internal geometries.
Micrographs also have a role in assessing the density of AM parts. These high-resolution images, obtained through techniques like optical or electron microscopy, provide a detailed view of the internal structure of AM components at a microscopic level. By analyzing micrographs, engineers can identify variations in material distribution, pore sizes, and voids within the parts. This information enables accurate density determination and aids in evaluating the overall quality of the AM parts, guiding process optimization and ensuring the production of structurally sound and reliable components.
Finite element analysis (FEA) is another powerful tool that enables predictive density analysis by simulating the mechanical behaviour of a 3D printed part under various loading conditions. FEA models take into account factors such as material properties, layer adhesion, and geometry, providing a virtual environment to test and optimize designs before physical manufacturing begins. This computational approach offers insights into how density variations influence a component’s response to external forces and helps in making informed decisions about design modifications.
The Archimedes method for density determination remains the easiest to use, but can also be the least accurate as it can be negatively impacted by changing environmental conditions, the accuracy of the balance, as well as the precision of the experimental procedure. It is difficult to reproduce the results, which are strongly influenced by human factors. Test specimens are never placed exactly the same on the balance, and the manual operation of the balances leads to measurement deviations.
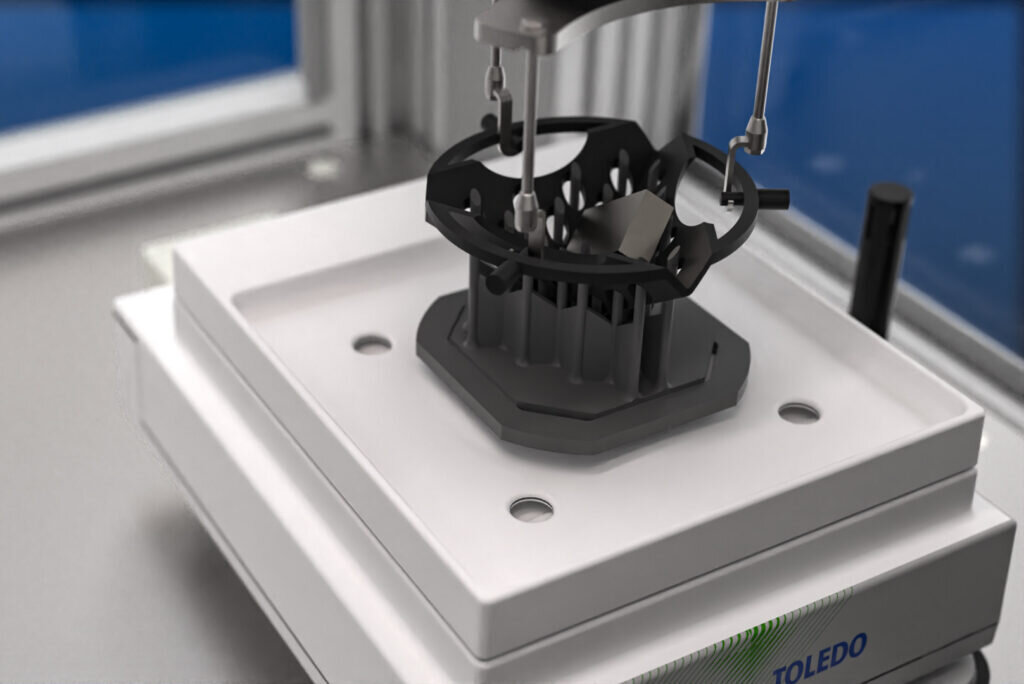
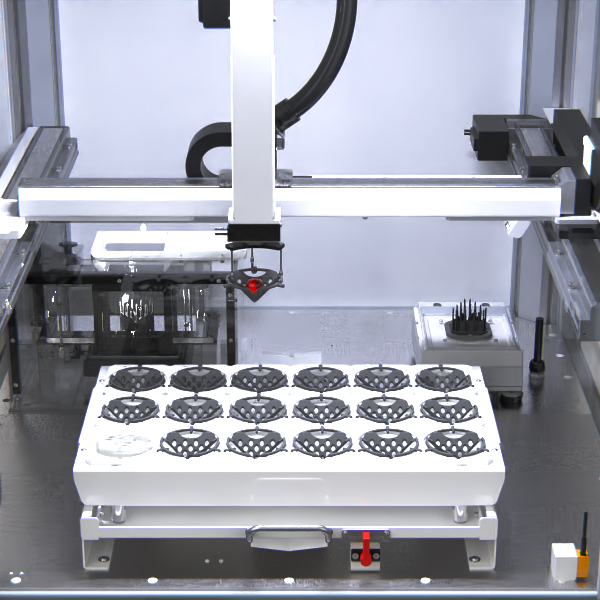
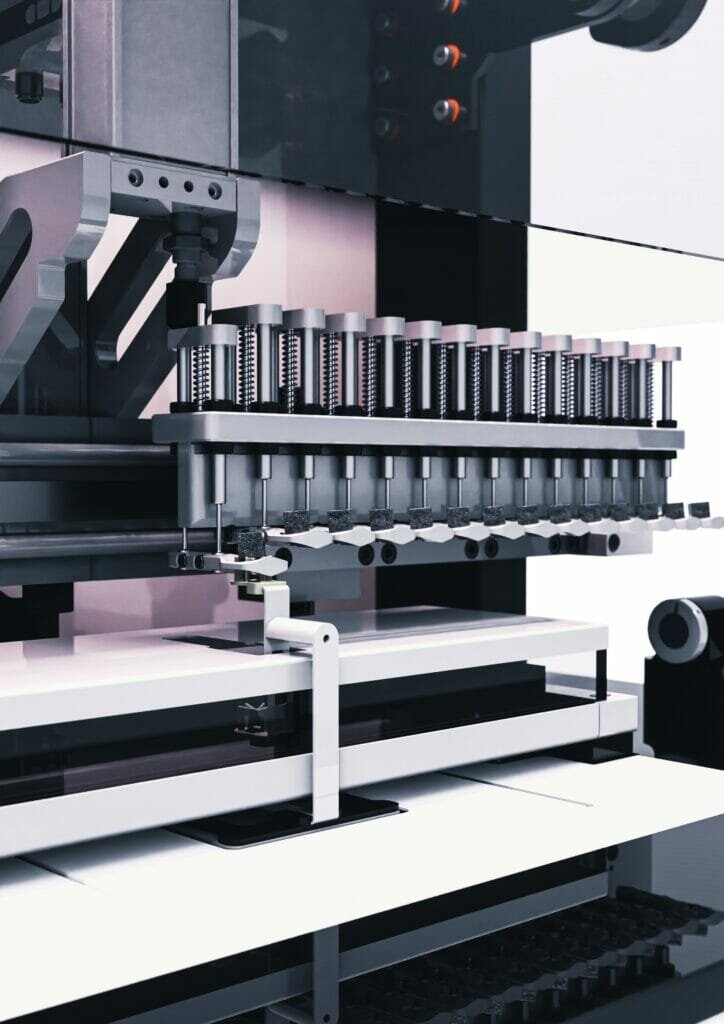
With this in mind, the most recent and disruptive density determination technology developed by Dimensionics Density effectively uses the Archimedes method but in combination with modern automation technology. The samples to be measured are placed in a special component carrier, which is provided with openings on the underside. These component carriers are transported through the system by an axis robot and thus lowered centrally and precisely onto the scales. On the scales themselves, a lift-out rack with pins is placed, which lifts the component over the openings in the component carrier and thus lifts the component out of the carrier.
The automated handling eliminates human influence on the measurement, as the parts are always placed identically onto the scales. The scales are designed to be insulated from vibration. In addition, all ambient conditions such as temperature, air pressure, and water temperature, are recorded via climate sensors, and their influence on the measurement result is taken into account directly in the evaluation algorithm when determining the density.
This automated density determination solution can easily determine the density of freeform parts and highly complex AM parts and can measure density repeatably to 0.001 g/cm3. With a cycle time of less than 2 minutes per component and the possibility of inspecting up to 18 components simultaneously in one inspection process as standard, the automated Archimedes solution supports the optimisation and efficiency of manufacturing processes.
It is also non-destructive and, therefore can be used to verify parts that conform to density requirements and those that don’t in a speedy, precise, and cost-effective manner.
The key to effective AM part density determination is that it must offer reliable results quickly and at the same time be easy to use. Dimensionic Density’s solution is much quicker than analysing density determination with a CT scan or through microsection analysis. It is therefore a perfect fit for companies producing parts in large numbers. As industry in general is moving towards the use of AM for serial production, the place of a non-destructive, reliable but also speedy quality control method for density determination is therefore ensured.
Driving AM Forward
Quality validation in AM is not only about ensuring individual part integrity but also about building trust in the technology as a whole. As industries increasingly turn to AM for the production of critical components, the need for comprehensive validation becomes more pronounced. Achieving optimal density, backed by advanced analysis techniques, contributes significantly to this validation process by enhancing mechanical properties, dimensional accuracy, and overall reliability.
The journey towards unlocking the full potential of AM demands a collaborative effort among designers, engineers, researchers, and manufacturers. While challenges persist, strides are being made in refining printing processes, optimizing materials, and developing advanced analysis tools. Through a holistic approach to quality validation, AM can continue to revolutionize industries by delivering innovative, efficient, and reliable solutions that meet the stringent demands of modern manufacturing.
www.dimensionics-density.com/additive


