All instruments and measurement tools drift over time and will need calibration. Standards and traceability are closely related. The latter refers to procedures and records demonstrating that calibrations accurately represent the measurements explain Ibrahim Ibrahim and Eddy Jones of calibrate.co.uk.
To claim traceability, a calibration laboratory must have documented measurement procedures and calibration reports to provide evidence about the traceability of the measurements. This article will look at the calibration regimes for three common types of tools and devices: crimp tools, torque wrenches and weighing scales.
Each calibration method is subject to different standards and regulations according to the application, but the end objective is the same – assuring the quality of the resulting product like crimp quality or measurement of torque (Nm) and weight (kg).
Crimp tools
Connectors for electrical and electronic equipment are regulated by the International Electrotechnical Commission technical committee TC 48 which specifies electrical connectors and mechanical structures for electrical and electronic equipment, and also by UL486A in the US.
The crimping tools used within industries such as aviation and critical manufacturing processes need to be calibrated in accordance with these standards to assure crimp security and quality. Terminals are designed to perform to specification only when the final crimp form is within a narrow range of dimensions.
Controlling critical crimp dimensions is influenced by many factors including wire size and material variation and terminal size and material variation. Tyco and Cablecraft both produce useful guides about crimp quality.
It pays to ensure the tool and dies are calibrated and maintained in a serviceable condition. It is important to calibrate crimp tools annually or every 10,000 crimps, whichever is sooner. Calibrating a crimp tool involves the tool being subjected to a pull test in accordance with BS EN60352 Part 2 general requirements, test methods and practical guidance for solderless crimped connections.
Simple manual testers suitable for in-house testing require careful handling by an operator in order to produce reliable results, whereas motorised pull testers are more reliable and have more capabilities.
Motorised testers have controlled speed and they usually have a stop feature, in order to avoid overstressing of the load cell. The UltraTest Mecmesin Advanced Force Gauge AFG 500N motorised test system shown in image 1 performs tensile and compression testing up to 500 N.
A motorised test stand, with special fixtures for variable sizes and shapes of wires and connectors, applies tensile force at a consistent speed as required by test standards. When a pull test is performed, the motorised tester pulls the crimp until the wire breaks and the maximum force is recorded. Consistent test speeds ensure repeatability.
Torque Wrenches
Common applications of torque wrenches include the automotive industry and piping applications, such as high pressure natural gas stations where the bolts used for flanged connections must be tightened according to the manufacturer’s specifications to avoid damage to critical equipment or causing a serious accident or gas leakage.
When a high pressure gas station is manufactured most of the pipe connections to valves and meters are flanged. Various nuts and bolts are used for the flange connections, which must be tightened by using torque wrenches.
The torque that must be applied to each nut is specified by the manufacturer. If the torque is lower than the nominated value, leakages or even disconnections may occur.
If it is of a higher value, shear damage to the thread on fasteners of critical equipment may occur, leading to industrial accidents and injuries. The only sure way that proper torque is applied is to have the torque wrench calibrated.
Modern Torque Testers can measure in clockwise and counter-clockwise directions, they can convert the reading to many torque units and they have three modes of operation (peak, first peak, and track).
A Norbar torque wrench analyser handles ‘click’, dial, bending beam and electronic tools to 1000 Nm. ‘Track’ displays the live value, ‘Memory’ records the highest value and ‘Memory Auto Reset’ records the first peak of torque (for click type wrenches).
Transducer shafts are constructed from precision machined and heat-treated stainless steel onto which strain gauges are bonded in the form of a Wheatstone Bridge. These strain gauges vary their electrical resistance in direct proportion to the strain produced in the steel shaft by the applied torque.
This small change in resistance causes a change in voltage across the strain gauges, which is amplified within the display unit. The gauges are bonded to the shaft in a configuration that ignores bending moments and other forces, and only responds to the true torque applied. The gauge configuration also helps in maintaining temperature stability.
Weighing scales
Weighing scales are used in the medical and pharmaceutical industries, in the building sector and in the food industry. They may lose their accuracy for a variety of reasons: sometimes their mechanical components may become worn out and cause a change in the reading. Environmental factors play an important role as well.
There are two major categories of scales: automatic and non-automatic. Automatic weighing instruments are capable of performing consecutive weighing cycles without any intervention of an operator.
These instruments are a special category and are handled according to the Measuring Instruments Directive (MID – 2004/22/EC). Non-automatic instruments require an operator to determine or verify the weighing result.
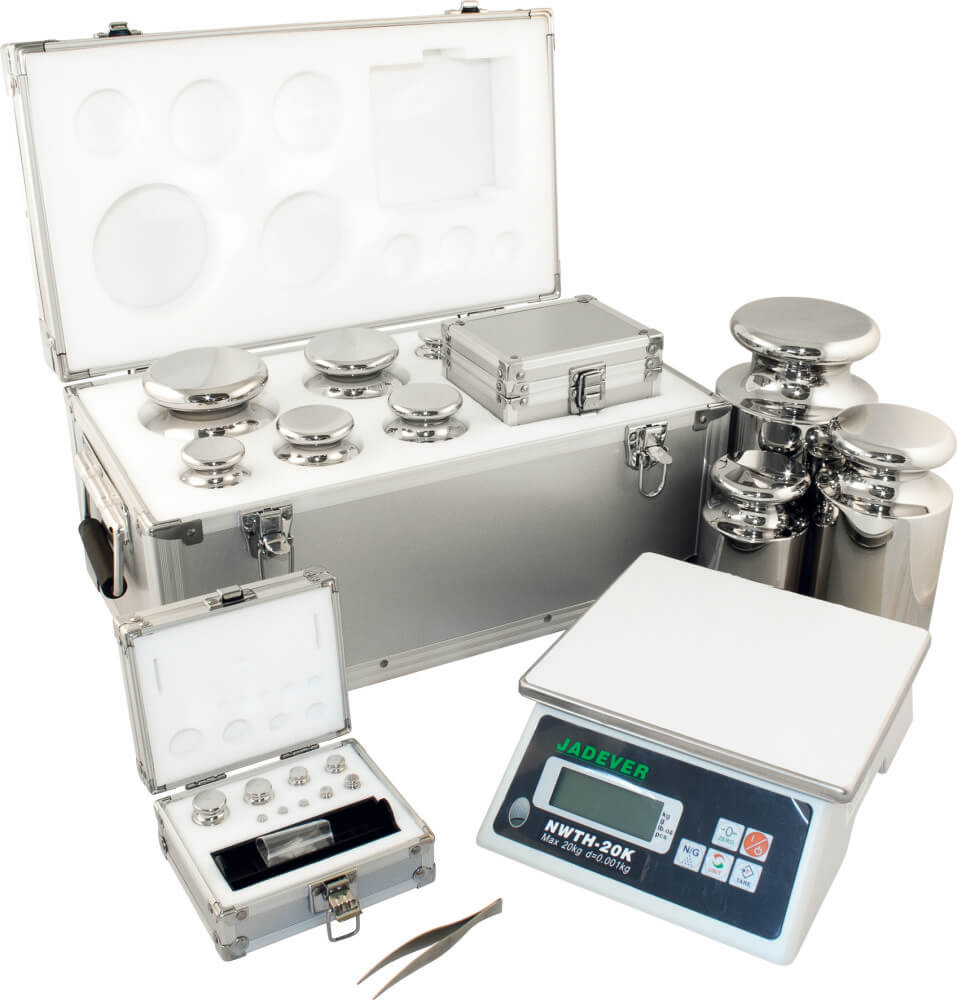
Typical scale calibration involves weighing various standard weights as shown in image 2 in separate repeatability, eccentricity and weighing indication error tests.
A key test for centre of gravity, the eccentricity test involves placing the object being weighed in the middle of the load receptor as accurately as possible. This is sometimes difficult due to the shape or construction of the object being weighed.
The test aims to determine how much the eccentricity of the load will affect the indication on the scale by weighing the same weight at the corners of the load receptor. There is also a test for indication errors at several predefined loads to allow correction of errors and definitions for non-linearity and hysteresis. Beamex has a useful white paper on the subject of weighing instrument calibration.
Calibrating the calibrators
A calibration tool may itself need calibration. For example, the Norbar torque wrench analyser is regularly subjected to manufacturer tests with different known torques generated by applying masses calibrated to produce forces at the known radius of an unsupported length calibrated beam.
Calibration is best left to experts, whether in-house or outsourced. In the former case, manual or non-automated testers may be the only option allowed by budgetary constraints to offset the cost of skilled operators. However, outsourcing takes a company’s calibration activity off the balance sheet.
0845 365 3944


Leave a Reply