“How long is a piece of string” goes the famous English-language saying. It may be a good answer when no
obvious answer otherwise exists. But when it comes to measuring anything, getting the figures right is often
a crucial part to any successful undertaking. We know this from experience: the history of engineering is
littered with errors of all magnitudes – and regardless of the actual margin of error involved, outcomes can be
costly. Very costly indeed.
Taking precise measurements is a well-documented human endeavour. Clay tablets dating from the late
Babylonian period were excavated in Mesopotamia’s ancient cities. Some of these surviving tablets are
known to have recorded various measures of weight, capacity and length. Fast-forward to the 21st century,
and our measuring needs remain as important as they were to our early ancestors. For Japanese measuring
specialist KEYENCE, a world leader in product innovation, providing its customers with devices of the
highest quality is a must. In a modern economy – an economy as competitive as today’s, striving to make the
best measuring instruments is a key driver.
KEYENCE offers a wide range of measurement solutions that are used in various businesses where quality
and repeatability are non-negotiable goals. The industry-leading image dimension measurement systems
that the company is designing and manufacturing allow customers to perform the most accurate inspections
at a level of speed that is unparalleled.
NEMA Ltd, a manufacturer of motors, actuators and electromechanical assemblies, is a KEYENCE customer
whose inspection requirements are of the highest level imaginable. Originally formed in 1954 under the name
of The Nordale Spring Company, NEMA has a long expertise with supplying a variety of markets – including
the Aerospace, Defence, Marine and High Voltage Switchgear sectors.
In the early nineties the company gained an ISO 9001 accredited certification, which it continues to hold to
this day. At the turn of the millennium, the company engaged a team of highly experienced engineers to
develop and implement the successful manufacturing of a wide range of electric actuation products,
specifically for the aerospace industry. In order to better reflect the change to its core business, the name of
the company was then changed to NEMA (Nordale Electro-Mechanical Actuation).
NEMA also pursued aerospace standards and in 2005 the company achieved an AS 9100 accreditation for
the manufacture of Electric Motors, Electro-Mechanical Assemblies and components. This accreditation also
included the springs and pressings facility. These two accreditations were subsequently amended to include
Repair and overhaul of Electro-Mechanical devices, as well the design and development of Electric Motors,
Electro-Mechanical Assemblies and components.
“The company has been under its present ownership since 1989” explains Andy Wilding, Managing Director
at NEMA Ltd. “Aiming for, and indeed maintaining, the highest possible standards is an absolute necessity
for us. We were committed to investing heavily in our inspection facilities, and we had already identified
areas where we felt improvements could be made.”
Companies involved in the aerospace industry face very stringent inspection requirements on a regular
basis. These requirements can be time consuming, putting a bottleneck on production, reducing productivity
and, ultimately, costing money. In some cases, they may even provide a barrier to dealing with some of the
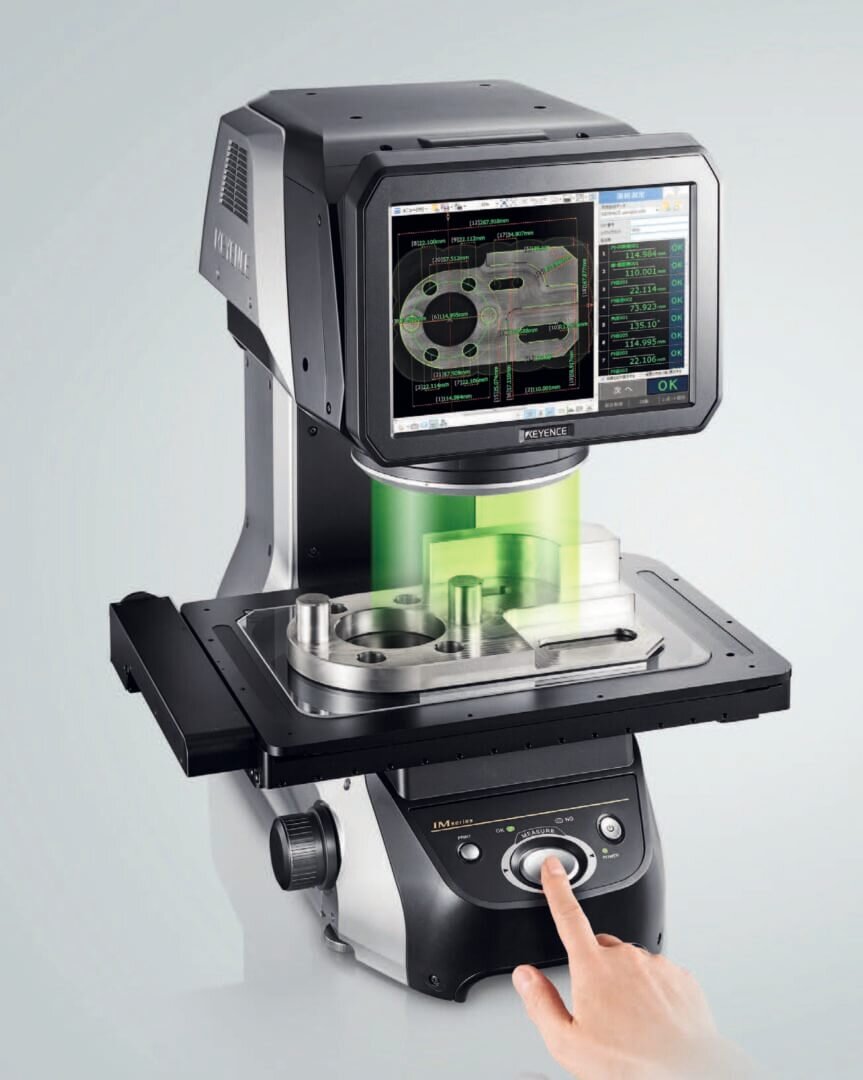
larger Tier 1 companies. With the IM Series, more accurate measurements can be made, and in a shorter
space of time, eliminating bottlenecks and reducing costs.
Naturally, the management of NEMA Ltd decided to take a closer look at KEYENCE measurement systems.
“With new equipment and a controlled environment, we felt the IM Series by KEYENCE was a key device for
us to acquire” continues Wilding. “In a nutshell: it matched our needs perfectly.”
The IM Series Image Dimension Measurement System from KEYENCE that was purchased by NEMA
proved a game-changing acquisition. The device was selected because of its range of specialist
measurement tools, its built-in dimensional reporting feature and its speed of measurement, amongst other
criteria. These features all play a role in NEMA’s design, development and repair of Electric Motors and
Electro-Mechanical Assemblies.
The new image measurement system allows NEMA personnel to measure more accurately than before.
“This new KEYENCE device has proved essential to us in our efforts to continue to satisfy our varied
customer base, which includes various Tier 1 aerospace companies” concludes Andy Wilding.
To learn more about the KEYENCE IM Series Image Dimension Measurement solution, visit:
www.keyence.co.uk/NEMA

