Peter de Groot, Chief Scienitist, Zygo Corporation
Over the last few decades, additive manufacturing (AM) / 3D printing has fundamentally changed the way that manufacturers approach product development. Industry is now almost universally aware of the term rapid prototyping, using AM to convert 3D CAD data into physical models in a matter of hours. The role of AM in prototyping has become embedded across all industrial sectors.
AM has enabled concurrent engineering―where all relevant departments can be engaged early in the product development process. Concurrent engineering replaces traditional “over-the-wall” product development, where design iterations could be delayed by weeks to accommodate tooling and machining considerations. The benefits are dramatic time-to-market reductions and cost savings in product development.
AM is a uniquely disruptive technology. 25-30 years ago, it changed the manufacturing paradigm by altering the way that manufacturers produced prototypes. Today, it is disrupting the way that manufacturers produce end-use parts and components and is increasingly seen as a truly viable production technique. Now the conversation among manufacturers is around the most judicious use of AM for production, its advantages, the sweet spot is in terms of production volumes, key opportunities, and barriers to entry. Many of these barriers relate to precision quality control of AM parts, which challenge traditional methods of surface metrology.
GOOD ENOUGH?
With the focus today being on the use of AM for production, the analysis of the accuracy and repeatable tolerance attainment of AM has become a far more critical issue. When used as a prototyping technology, absolute adherence to tolerances and precise design intent is not always necessary, and a “good enough” approach can be taken. Hence the proliferation of quite inexpensive desktop 3D printing machines that provide sufficiently accurate rapid prototypes that do the job without needing to be pitch perfect.
For production applications, however, “good enough” is no longer sufficient. If an AM part is integral to a safety critical aerospace or medical application, it is essential to achieve dimensional and material tolerance targets consistent with design intent. It is here that the role of metrology to validate the quality of finished parts is so important. It is also an area where providers like ZYGO of 3D optical metrology solutions can make a difference.
INDUSTRY RESPONSE
Legacy manufacturing processes for metals and plastics have established quality control methods for validating and measuring parts. The production processes are understood, as are the most critical dimensional and surface finish requirements. AM, however, does exactly what the name implies — it produces parts layer by layer “additively”, and this opens up an array of unique issues that can affect the integrity of a finished product, and also a unique set of surface characteristics that make the job of measuring and validating that much more difficult.
How the sector is responding to the metrology and validation conundrum was highly visible at the recent (and largest) AM-related event on the calendar, Formnext in Frankfurt, Germany. At various learning events on-site, metrology issues featured prominently, acknowledging the fact that measurement and validation of AM parts is a big deal today. In addition, AM technology providers are now developing in-process metrology (IPM) solutions to overcome the specialized challenges of verifying the integrity of AM processes.
AM technologies and metrology techniques have also captured the attention of professional societies that organize conferences and symposia worldwide. These include the American Society of Precision Engineering (ASPE), the International Society of Optics and Photonics (SPIE), and the International Academy for Production Engineering (CIRP). ZYGO participates in these events actively as an industry supporter, exhibitor, and presenter of scientific and engineering papers on the latest developments.

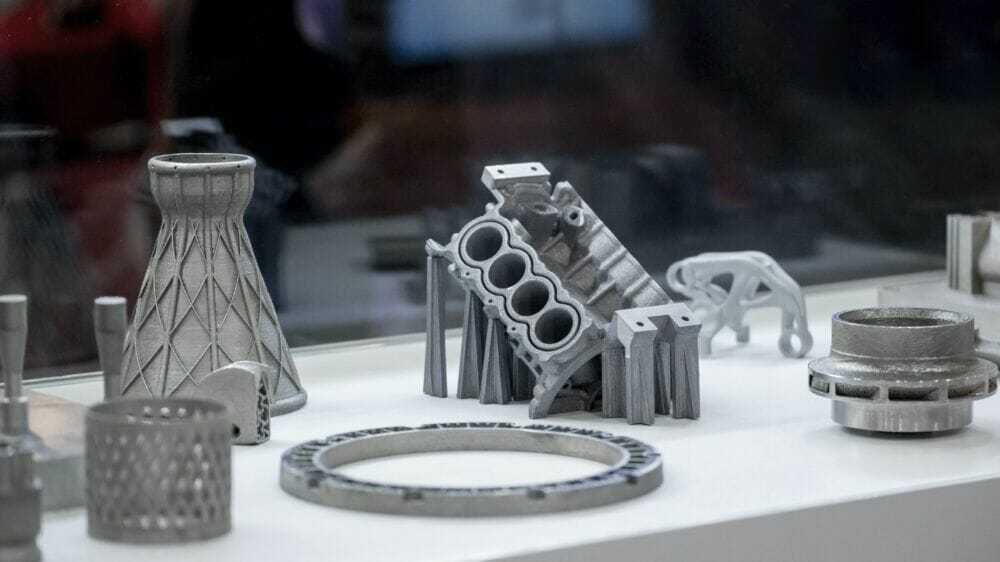
Object printed on metal 3d printer close-up. Object printed in laser sintering machine. Modern 3D printer printed from metal powder. Concept progressive additive DMLS, SLM, SLS 3d printing technology 
Metal products made by metal 3D printing. Modern additive technology.
RESEARCH IN AM METROLOGY
In the search for relevant metrology critical to process control, industry is still trying to understand what to look for on and under the surface of an AM produced part, and how these relate to part functionality. Surfaces of AM parts challenge existing surface topography measurement and defy characterization using standardized texture parameters because of high surface slopes, voids, weld marks, and undercut features.
Research into new and improved metrology for AM is advancing through a wide range of industry and academic partnerships, many in cooperation with ZYGO. An example is work at the University of Nottingham, where the Manufacturing Metrology Team (MMT) led by Prof. Richard Leach is investigating the full range of solutions, from high-precision interference microscopy to X-ray tomography of the internal structure of completed parts.
In just the past four years, the MMT has published 43 research papers on AM, ranging from methods to optimize measurements on specific instruments to new feature-based analysis and machine learning to interpret results. Of particular interest is IPM for evaluating the quality during manufacture, following each additive line and layer in real time. This information can be used to inform control strategies and later in-process metrology developments. An important part of IPM development is correlating to reference metrology, including benchtop surface metrology instruments.
Another example of leading-edge research is at the University of North Carolina at
Charlotte, where Prof. Christopher Evans and co-workers have been using interferometry and electron microscopy to study AM materials in collaboration with the US National Institute of Standards and Technology (NIST), and Carl Zeiss GmbH at Oak Ridge National Laboratory (ORNL). These researchers have been studying Inconel 625 — a high temperature Ni superalloy for AM, that exhibits an intriguing variety of surface signatures. These surfaces have areas rich in oxide films that are visible in true-colour, 3D surface topography maps obtained with ZYGO’s interference microscopes. These instruments also serve as excellent workhorses for examining large areas with high detail, such as distorted weld pools, by assembling or ‘stitching’ together multiple high-lateral resolution images each with millions of data points.
While the challenges of quality control of AM parts are a great concern for those who make these parts, these same challenges present an attractive opportunity for new solutions and spinoff businesses. Founded in 2018 in the UK, Taraz Metrology is an example of a spinoff enterprise which combines university research, practical engineering, and commercial experience into a unique product development capability customized to the needs of AM. Taraz currently offers freestanding final inspection solutions for all types of AM parts and leverages proprietary software for advanced fringe projection and photogrammetry of topography.
STANDARDIZATION AND TRACEABILITY
The ability of AM to produce geometrically complex parts, its role as an enabler of mass customization, and the potential time and cost savings associate with its use are all important for the future of industry. However, when compared to more familiar and established manufacturing methods, AM technology is dynamic and rapidly evolving, and technology innovators are working to overcome the barriers to adoption of AM for production applications, including those related to quality control standards.
ZYGO is actively researching calibration, traceability, characterization, and verification for surface topography measurements, with 16 papers published in the last 5 years alone on these topics, and a further seven specifically focused on physical modelling of optical measurements of surface structures — including complex, steeply-sloped surfaces characteristic of AM parts — and five more papers on the measurement of AM parts per se.
ZYGO is also a partner in the €2.2M EMPIR 20IND07 TracOptic project, with the title “Traceable industrial 3D roughness and dimensional measurement using optical 3D microscopy and optical distance sensors” — of obvious value to the AM sector.
National and international standards are critical both to Industry adoption and to assuring quality control across multiple, developing manufacturing technologies. ZYGO is an active member of ISO TC213 WG16 for the development of the ISO 25178 surface texture standards, working in collaboration with international experts on the ISO 25178-603 and 25178-604 standards for interference microscopy, and the 25178-700 standard for instrument calibration and traceability. ZYGO is also a member of the ASME B46.1 working group on surface texture analysis, which currently includes a task team concentrating on AM metrology standards.
POST-PROCESS METROLOGY
Measurements of AM parts post-process serve to validate conformance with design intent, and to provide clues into fabrication problems left by surface signatures. However, the uniqueness of AM processes and produced parts lead manufacturers to use an array of different mechanical and metrology verification techniques. They adopt an empirical approach as no one solution is trusted to provide accurate enough data. Gage R&R is used as a stand-in for a more rigorous measurement uncertainty approach. As a consequence, AM parts are often “over-tested” to improve confidence, but this means extra time and extra cost, areas that must be addressed to make AM for production more viable.
The open question is how to improve this situation for greater efficiency while maintaining confidence. The answer is for metrology solutions providers to adapt existing metrology technologies to better align them with the unique characteristics of the AM process and end-use AM parts, which are characterized by irregular, steeply sloped surface topography that many measurement technologies fail to capture.
Through extensive research and development of the foundational coherence scanning interferometry (CSI) technology in the ZYGO 3D optical profilers, high-accuracy AM metrology tools are now available to industry. Both instruments use innovative hardware and software upgrades, the package of improvements being referred to internally at ZYGO as “More Data Technology,” which makes the instruments much better suited to AM parts.
“More Data” significantly improves the baseline sensitivity of CSI and enables high-dynamic range (HDR) operation making it valuable for a wide range of parts, from steeply sloped smooth parts to exceptionally rough textures with poor reflectivity. Additionally, HDR measures parts with a wide range of reflectance, often a struggle for other instruments that use interferometry as a measurement principle. ZYGO was the first to demonstrate full-colour surface topography measurement of metal additive manufactured surfaces using interferometry, and ZYGO engineers actively use AM internally for instrument prototyping and applications development.
SUMMARY
With AM now an established production technology for certain applications, there are barriers to mass adoption that are being addressed, including the need for in-process and post-process metrology technologies that can validate the quality and accuracy of the parts produced. AM parts have a unique set of characteristics that render traditional measuring technologies impotent in some situations, and today innovative metrology technologies are being developed that can provide meaningful measurement data efficiently and cost-effectively. Only when such issues are addressed will the use of AM become mainstream as a viable production technology across an array of industry sectors and applications.
ACKNOWLEDGEMENTS
Many thanks to Chris Young, MicroPR&M, for great discussions and contributions to this article.


